As an Amazon Associate, we earn from qualifying purchases. Some links on this site are affiliate links at no extra cost to you. Our recommendations are based on thorough research and editorial judgment.

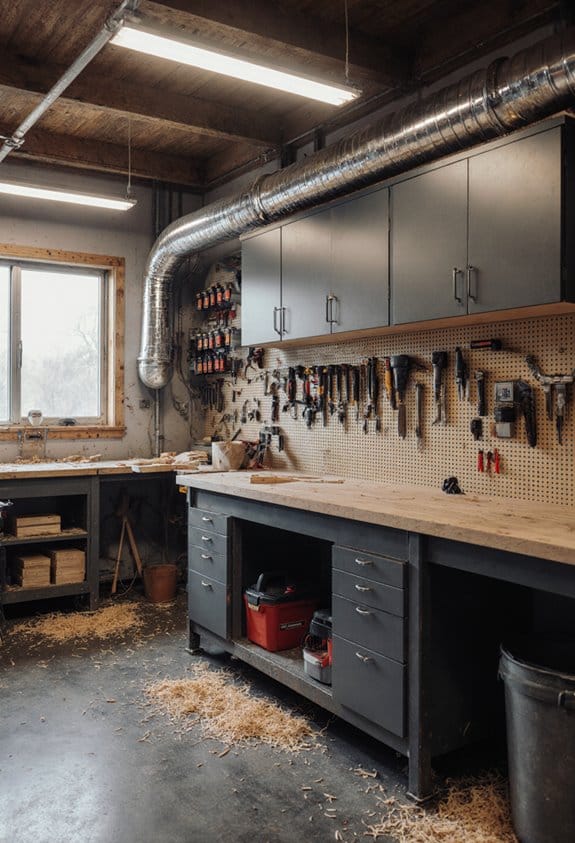
Understanding Amperage Draw on Different Tools

Ever tried using multiple power tools in your RV and ended up wondering why the lights were flickering? That’s a common headache when amperage draw starts messing with your electrical systems. When you plug in various tools, each one has a different appetite for power, and it’s important to know how that impacts what you’ve got running.
You may be interested


For instance, think about those smaller tools like jigsaws. They usually pull around 2-8 amps, which isn’t too heavy on your system. But then you’ve got tools like circular saws that can take up 6-16 amps. And let’s not forget air compressors—they can demand 20 amps or more!
So, how do you keep everything running smoothly without tripping breakers? Here’s the trick: always calculate the total amperage you need when you’re gearing up to use multiple devices. If you don’t, you risk overloading your circuits. That can make your RV equipment struggle or, even worse, lead to damage. Keeping an eye on those numbers ensures that everything works safely and efficiently.
Honestly, managing power isn’t just about preventing glitches. It’s also about enjoying your time on the road, knowing your tools are ready when you are. Have you ever had a tool die on you because it was drawing too much power? That’s a hard lesson learned!
To sum it up, being aware of the amperage each tool draws is key to your RV experience. Have you thought about how to balance all your devices’ power needs? Making those calculations ahead of time makes all the difference!
Key Takeaways
- Different tools have varying amperage draw, with small tools like sanders typically using 2-8 amps, while larger tools may require 6-16 amps or more.
- High-demand equipment, such as air compressors and welders, can draw 20 amps or more, necessitating careful management of power usage.
- Amperage calculations can be done using the formula A = W/V, where W is the wattage and V is the voltage (typically 110V in RVs).
- Startup amps for tools can be significantly higher than running amps, making it essential to consider these when planning power loads.
- Monitoring total amperage draw and keeping it below 80% of circuit capacity helps prevent overload and maintains safe electrical system operation.
Understanding Amps: Key Concepts for RV Owners
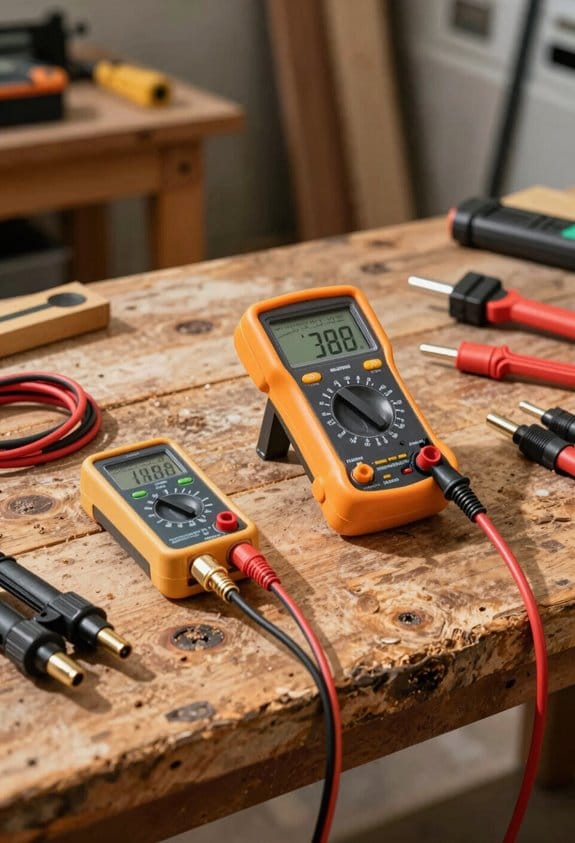
Understanding amps is a crucial part of being a savvy RV owner. If you don’t keep an eye on your electrical consumption, you could end up tripping circuit breakers or damaging your appliances. Every RV relies on a 110-VAC electrical system, which comes with circuit breakers rated for specific current limits. This setup is there for your safety, but it also means you need to be mindful about what you plug in.
Now, think about those high-current devices—like air conditioners and refrigerators. They can really pull a lot of amps, which affects your total draw. For instance, you might not realize that a microwave can draw anywhere from 7 to 13 amps. Then you’ve got other appliances, like a coffee pot, which can hit around 13.6 amps. If you’re not careful and run several high-draw appliances at once, you could find yourself face-to-face with a tripped breaker.
Here’s a trick: to keep track of what your devices are using, you can use the formula A = W/V. That means if you know the wattage of your device (that’s usually written on a label somewhere), just divide that by the voltage (which is typically 120 in RVs). It’ll help you gauge your amps and avoid any overloads.
So, why does this matter? Because understanding how many amps you’re using lets you safely operate your appliances and enjoy your camping experience without worries. Truth is, no one wants to climb into a hot RV after a day of adventures only to find the power’s out because of an overloaded circuit.
To further ensure safety, consider using circuit breaker lockouts to prevent accidental overloading and possible electrical hazards.
How Different Types of Power Tools Consume Amps in RVs

Have you ever tried using power tools in your RV and found yourself struggling with electrical issues? It can be frustrating, especially when you need those tools for repairs or projects on the road. Understanding how different power tools consume amps can really help you maintain your RV’s electrical system while avoiding any headaches.
Let’s break it down. Small power tools, like jigsaws and sanders, typically draw between 2 to 8 amps. These tools are pretty manageable for your RV’s setup. On the flip side, larger power tools can be a different story. Circular saws and table saws often require anywhere from 6 to 16 amps. If you’re not careful and use a couple of these tools at the same time, you could put a serious strain on your electrical system.
Now, what about those high-demand tools? Tools like air compressors or electric welders can pull 20 amps or even more. That’s where circuit protection comes into play. You don’t want to overload your circuits and end up in a situation where you can’t power anything because you’ve tripped the breaker. So, take a moment to think about your projects and the tools you’ll be using together.
You should also keep an eye on startup amps. They can exceed running amps significantly, which can impact overall power availability and circuit stability. Here’s the trick: If you anticipate using high-demand tools, it might be best to stagger their use to avoid overwhelming your electrical system. Additionally, using tools with efficient motors, such as those featuring a 15A brushless motor, can provide reliable performance while potentially reducing power consumption.
Recommended Products
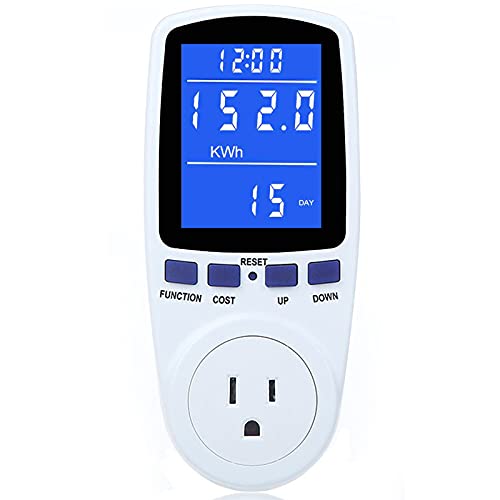
Various Monitoring Parameters: The power meter plug can monitor the power (W), energy (kWh), volts, amps, hertz, power factor, cost, minimum and maximum power (W), cumulative days and time of your appliances. By switching 7 display modes, you can easily know the various parameters while the appliance is working. The home energy monitor can also calculate and display how much power your appliance uses and how much electricity bill it cost in cumulative time

AT-A-GLANCE VOLTAGE STATUS INDICATOR - Dual-color LED display shows green when voltage is within safe range and red when voltage may be outside recommended levels.

Easy Installation: This digital energy meter is designed for simple installation in standard form 2S socket bases, making it ideal for RV, garage, and workshop electrical upgrades. The single-phase 120/240V design fits common power systems, allowing fast wiring into a breaker panel, meter box, or sub-panel without special tool. Its labeled terminals simplify connecting line, load, and neutral so you can begin monitoring kWh usage immediately through the bright LCD. Perfect for DIY users and professionals seeking reliable electric setup. The ANSI 2S 4-jaw fit ensures a quick snap-in install, while the Pulse and Reverse LEDs give instant confirmation of correct wiring & active meter operation.
Startup vs Running Amps: What to Know?

Ever wondered why your RV’s electrical system occasionally feels overwhelmed? One big culprit might be startup amps. When you’re using multiple power tools, those initial surges of energy can take a toll. Startup amps are often around 2 to 3 times higher than the running amps. For example, if you’re working with a tool that uses 1000 watts when it’s running, it might need between 2000 to 3000 watts just to get going.
So, what’s the difference? Running amps are the steady flow of electricity during normal operation, while startup amps measure that hefty initial draw when you flip the switch. To figure out how many startup amps you might encounter, you can use this simple formula: Startup Amps = Running Amps × 2. It’s simple math, but why does this even matter?
Understanding this difference is key to preventing overloads in your electrical system. If you’re not careful, you could trip breakers or worse, damage your gear. Here’s the trick: always check the startup requirements before you plug in multiple devices. This way, you can keep your electrical system safe and running smoothly.
In short, watch out for those startup amps! Keeping an eye on them can make a big difference in your RV experience. Have you ever had issues with electric tools because of this? Using tools with a digital angle finder can help monitor usage more efficiently and avoid unexpected power surges.
Calculating Your Amperage Draw for RV Tools
Ever been in the middle of cooking in your RV, only to have the lights flicker and everything shut off? It’s a frustrating experience, and it usually comes down to one thing: the amperage draw of your tools and appliances. Knowing how to calculate that draw can save you a lot of headaches.
To figure out the amperage you’ll need, just use the formula A = W/V. Here, W stands for the wattage of your tools, and since RVs typically run on around 110V, that’s what you’ll use in your calculations. For example, if you’ve got a power tool rated at 1500 watts, you’d be looking at a draw of about 13.6 amps. And don’t forget to keep an eye on all the tools you’re using at the same time. Larger appliances like air conditioners can pull a hefty 15-20 amps, while smaller devices usually range from 1-8 amps.
So, why does this matter? Well, if you don’t monitor your total amperage draw, you run the risk of tripping breakers or even damaging your electrical systems. It’s a good idea to regularly check how much you’re drawing, especially when the summer heat hits and you need that AC.
Keep these tips in mind:
- Always add up the amps from all devices you’re using.
- If you’re using multiple high-draw appliances at once, consider staggering their use.
- Stay within the safe operational limits of your circuits.
Additionally, just as choosing the right material and blade affects the performance of a coping saw, selecting tools with appropriate power ratings can optimize your RV’s electrical load.
Truth is, being proactive about your amperage can help ensure a smooth and safe RV experience. Got your own tips for managing power in your RV? Share what’s worked for you!
Recommended Products

1. Monitors key AC power readings in one panel display: This hardwired AC power meter shows voltage, current, wattage, kWh energy, frequency and power factor, helping you watch generator load, RV power, workshop circuits or appliance consumption in real time

Multi-function power monitor: Our electric usage monitor can monitor the power (W), electricity(kWh), voltage(V), frequency(Hz), current(A), power factor(PF), unit price($/kWh), total cost($) of your appliances. By switching 8 display modes, you can easily know the various parameters while the appliance is working. The “electricity” mode can calculate and display how much power your appliance uses. And the “total cost” mode will show how much electricity bill it cost in cumulative time

✅ COMPLETE KIT FOR YOU TO INSTALL: Includes heavy duty steel box housing, meter display module, 14-50 outlet and cable gland. Everything you need to install in your existing circuit
How to Size Your RV’s Electrical Circuits Like a Pro
Sizing your RV’s electrical circuits can feel daunting, but it’s crucial for creating a safe and comfortable space on the road. If you’ve ever been stuck with too much power running through your circuits, you know why this matters—overloading can lead to some serious issues. The rule of thumb here is to keep your current draw at no more than 80% of the circuit’s capacity. For example, if you’ve got a circuit rated for 10 amps, stick to using 8 amps or less.
Take a good look at your appliances, especially high-current ones like air conditioners. They can pull a hefty 10-16 amps, so it’s important to check their amperage ratings. For example, a coffee pot may draw up to 13.6 amps if it’s running at its maximum 1500-watt capacity. Want to double-check your load? Just keep this formula handy: A = W/V. Plug your numbers in, and you’ll quickly see if your circuit can handle the load, keeping your adventures safe and worry-free.
So, why is it so important? Too often, I hear stories of folks dealing with tripped breakers or worse, electrical fires. The best part is that by sizing your circuits right, you’re not just avoiding disasters—you’re also ensuring your RV runs smoothly, letting you enjoy every moment of your travels. Using tools with consistent power sources helps maintain safety and efficiency on your electrical circuits.
Before you hit the road, take a few minutes to go over your electrical setup. It could save you a headache down the line. Don’t you want to be able to brew that morning coffee without fear?
Recommended Products
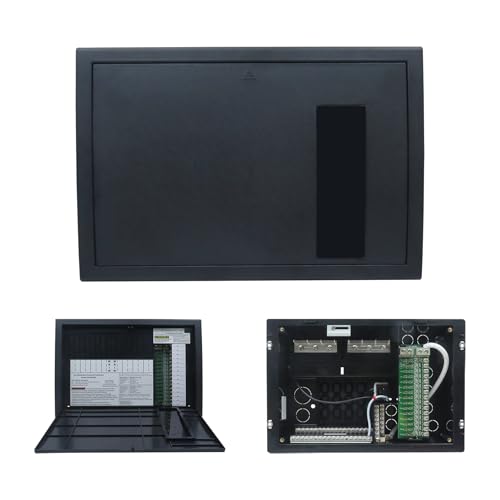
The WF-8930/50NPB is a highly functional rv power distribution panel with great flexibility. It can be used as a 50-ampere power distribution center or a 30-ampere power distribution center, capable of meeting different power supply configuration requirements. Its input voltage supports 120-volt AC or 240-volt AC, ensuring stable operation in various power environments.

Detailed parameter information of WF-8930:The WF-8930/50NPB RV Power Distribution Center is a versatile power solution designed for recreational vehicles. It features a selectable 30 A or 50 A AC main breaker, compatibility with 120 VAC or 240 VAC, 15 DC circuits, and up to 12 AC branch circuits to power multiple devices simultaneously. With a lightweight design of only 3.75 lbs, it fits perfectly into your RV's electrical system without taking up too much valuable interior space.

Single pole, 20 Amp, 120V type QP Circuit Breaker
Tips for Saving Energy With Power Tools in Your RV
Saving energy in our RV while using power tools can feel like a bit of a balancing act, especially when you’re trying to preserve battery life and keep your electrical system running smoothly. Have you ever noticed how power tools can drain your energy fast? Choosing the right tools and using them wisely makes all the difference.
If you’ve got some higher-draw tools in your kit, like air compressors, consider using them during off-peak hours when you’re hooked up to shore power. This simple shift can help reduce your electricity costs. Now, to make life easier, think about sticking to small power tools. Tools that use between 2-8 amps are perfect for keeping your energy consumption low.
Another handy tip? Unplug your tools when you’re not using them. It’s surprising how often phantom power loss creeps in. And if you’re really keen on keeping an eye on your energy usage, grab a power meter. This gadget can help you monitor how much amperage your tools are pulling. It ensures you’re staying within safe circuit limits while optimizing efficiency in your RV.
Also, using a dust collector with efficient filtration can improve air quality and reduce maintenance in your workspace, which contributes to a safer and more comfortable environment during projects.
With these tips, you’ll be able to use power tools in your RV without breaking the bank on energy costs. So, what’s your go-to tool for those RV projects?
Why Solar Generators Are a Must-Have for RV Power
Ever been in the middle of a camping trip, ready to fire up your coffee maker or charge your devices, only to find you’re off the grid with no power source? It’s frustrating. That’s where solar generators come into play, making life on the road a whole lot easier. Take the Jackery Solar Generator 1000 Plus, for instance. With a powerful output of 2000W and a hefty capacity of 1264Wh, it lets you run all sorts of appliances without needing to plug into grid electricity.
Solar generators are perfect for all kinds of tools, whether you’re working with power tools or smaller gadgets. Imagine being able to tackle projects right there at your campsite without worrying about running out of battery. The cool thing is that when you combine solar panels with a portable power station, you’re not just using energy – you’re collecting and storing it.
One of the standout features of solar generators is their pure sine wave inverters. Why does this matter? Well, they provide a clean and efficient power source. This means less strain on your devices and a reduced environmental impact while you’re enjoying the great outdoors. Additionally, pairing your solar generator with cordless shop vacs can greatly enhance cleaning convenience on the go.
Recommended Products

Portable Generator with 60W Solar Panel Included: with a big battery pack, ZeroKor 300W power stations Generator are powerful enough to charge smartphones,tablets,laptops,headphones or other outdoor small camping supplies(Tips:Using electrical appliances over 300W may damage the portable solar generator, especially some devices that are prone to heat or built-in air compressor such as coffee maker,Hair dryer, water pump etc )

PORTABLE GENERATOR 80000mAh Lithium Battery With 60W SOLAR PANEL INCLUDED: With a superior lithium-ion battery pack, 300W power stations are powerful enough to charge smartphones,tablets,laptops,headphones or other outdoor Small Camping supplies

Powerful yet Compact: Boasting a 1,500W AC output and a 3,000W surge peak, the Solar Generator 1000 V2 can power multiple appliances, including AC units, fridges, and electric pots. With a 1,070Wh capacity and a lightweight build of only 23.8 lbs, along with a foldable handle, it makes an excellent companion for outdoor camping, road trips, and emergencies.
Measuring Amperage: Tools and Techniques for RV Owners
Have you ever wondered how to keep your RV’s electrical system running smoothly? Accurately measuring amperage draw is a crucial skill for any RV owner. It can save you from potential headaches like blown fuses or overloaded circuits, so let’s talk about how you can do this effectively.
Digital multimeters (DMMs) are pretty handy for checking amperage, but keep in mind they typically cap out at 20 amps. If you think you might be dealing with higher currents, it’s a smart move to use a low-value resistor instead. By measuring the voltage drop across that resistor, you can apply the formula *V = IR* to figure out your current. This method can give you a clearer picture without stressing your tools.
Now, if you’re looking for something less invasive, current clamps could be your best friend. They allow you to measure amperage without disconnecting any wires. However, do keep an eye on the precision; it can vary from one device to another. Here’s the trick: always calibrate before use to ensure accuracy.
For those of you who want to dive deeper, Picoscope devices are excellent for detailed testing and way more portable than traditional oscilloscopes. They might take a bit of getting used to, but they’ll definitely provide valuable insights into your electrical parameters. Keeping track of these readings helps manage power consumption effectively and prevents overloads that could trip circuit breakers.
Also, choosing equipment with the proper diameter compatibility ensures you measure accurately and maintain efficient connections during your testing.
Recommended Products
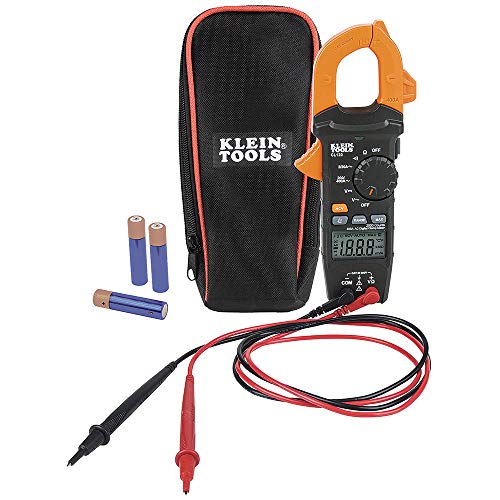
VERSITILE CLAMP METER: Measures AC current and NCVT via clamp; AC/DC voltage, resistance, and continuity via test-leads
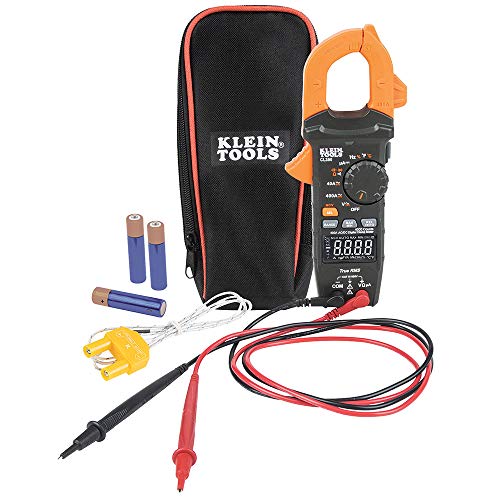
VERSATILE CLAMP METER: Measures AC/DC current and NCVT via clamp; AC/DC voltage, resistance, continuity, frequency/duty cycle, DC microamps, diode test and capacitance via test-leads; temperature via thermocouple

【5-in-1 Multifunctional Clamp Meter】Covers AC current (2A/20A/200A/400A max), AC/DC voltage (600V max), resistance (20MΩ max), continuity & diode polarity detection; one-click function switch via FUNC button meets daily & professional electrical measurement needs.
Frequently Asked Questions About Amps and Your RV Tools?
How can you get a better grip on amps when using tools in your RV? It can be a bit tricky because the amp ratings can really vary depending on the tool. Take table saws, for example. These beasts can pull a whopping 30-45 amps when they first start up, even though they typically run around 15 amps.
Most RV electrical systems are set up to handle a maximum of 15-20 amps on standard breakers. Before you plug something in, it’s a good idea to check the user manual for the specific amperage ratings. Here’s a quick tip: add up the total draw of all your tools and appliances, like microwaves and space heaters, to ensure you stay below 80% of your breaker’s capacity.
Why is this so important? Well, staying within that limit helps prevent circuit overload and keeps everything running smoothly and safely. Remember, keeping a close eye on your amp usage can save you from unexpected power trips and headaches down the road. For additional safety, consider tools with impact resistance standards to reduce risks during operation.
Frequently Asked Questions
Are More Amps Better for Power Tools?
Think of amps as the lifeblood of power tools; while high amperage enhances tool performance and efficiency, it’s essential we consider voltage influence and load calculation to match our power requirements for ideal results.
How to Figure Out How Many Amps Something Draws?
To figure out how many amps something draws, we can use amperage calculation methods based on tool power ratings, considering voltage versus amperage and load demand factors for electrical circuit safety and energy efficiency standards.
What Is Better, 100 Amp or 200 Amp?
We believe a 200 amp service offers more advantages than a 100 amp, especially for larger homes. It guarantees safety, supports future needs, and provides efficiency, making it worth the cost in most usage scenarios.
How Many Amps Do Typical Power Tools Draw?
Typical power tools draw between 2 to 20 amps, depending on their specifications. By considering power tool efficiency and amperage safety, we can better understand voltage vs amperage and energy consumption rates for maximum performance.

