As an Amazon Associate, we earn from qualifying purchases. Some links on this site are affiliate links at no extra cost to you. Our recommendations are based on thorough research and editorial judgment.

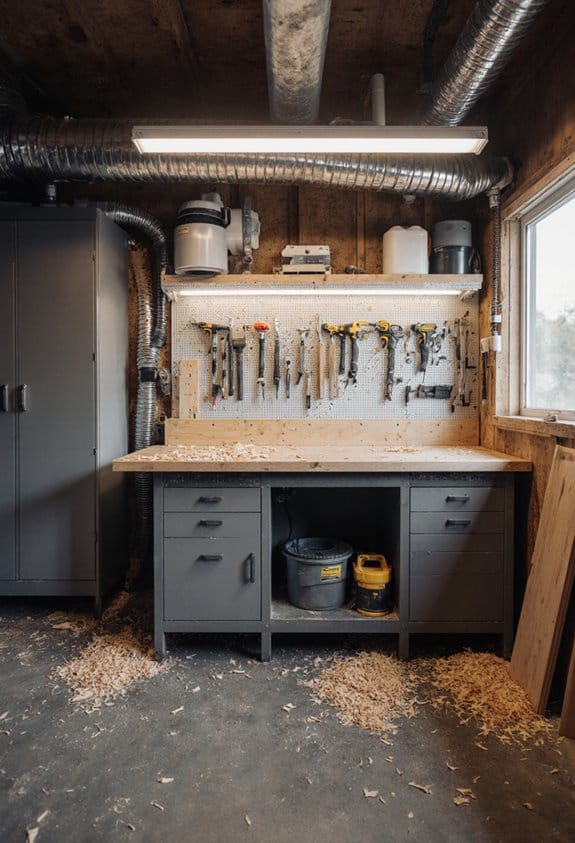
Understanding Workshop Zones: Planning Your Space

Ever found yourself scrambling around your workshop looking for the tool you just had in your hand? It’s frustrating, isn’t it? Understanding workshop zones can make a huge difference in how efficiently you work. When you set up specific areas for cutting, assembling, and finishing tasks, you can save a ton of time—up to 30% according to some studies!
You may be interested


To really get the most out of your space, consider organizing with pegboards and rolling chests. These tools help keep everything in its place and make it easy to grab what you need without wasting time. It also cuts down on distractions, which means a safer area to work in.
And trust me, keeping clear walkways is a must. You really don’t want to trip over something while carrying a heavy load.
So, how can you make sure your workshop is safe and comfortable? Regular safety audits can help you spot potential hazards before they become a problem. Also, don’t forget to arrange your tools in a way that makes sense for your workflow. Keep those frequently-used items close and put the less-used ones farther away.
The best part is these strategies don’t just help you work faster, they also create a space that feels good to be in. A well-organized workshop can spark creativity and make the whole experience more enjoyable.
In short, a little planning can lead to big improvements. How will you set up your workshop zones to get the most out of your space?
Key Takeaways
- Define specific zones for cutting, assembling, and finishing to streamline workflow and enhance productivity.
- Utilize vertical storage solutions like shelves and pegboards to maximize tool access and minimize clutter.
- Place tools strategically, grouping them by usage near workbenches and power sources for efficient workflow.
- Implement safety measures with designated areas for hazardous materials and accessible first-aid kits in each zone.
- Incorporate clear signage to identify zones and promote safety awareness, facilitating better navigation and organization.
Importance of Defining Workshop Zones for Productivity
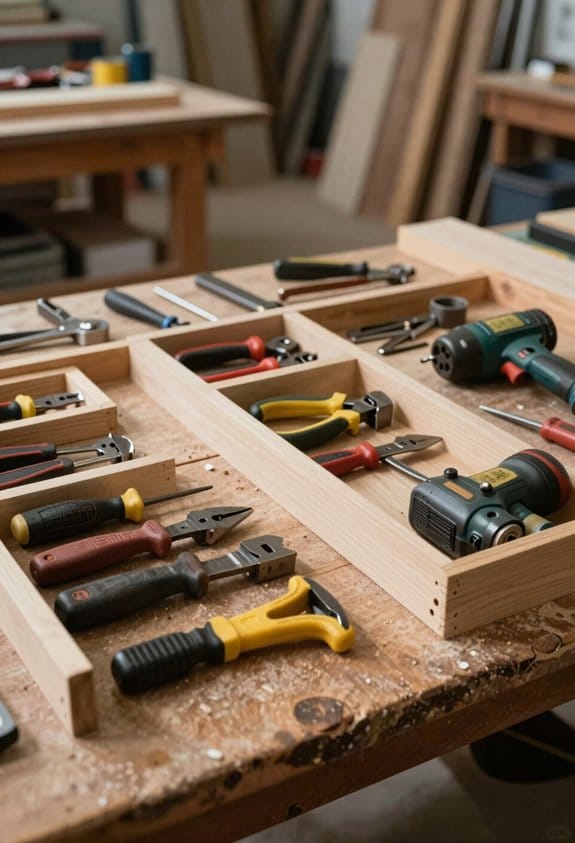
Ever wonder why some workshops feel chaotic while others are smooth sailing? The secret could be in defining your workshop zones. Setting up specific areas for cutting, assembly, and finishing isn’t just about looking good; it’s about making your workflow more efficient. Here’s the trick: when you have dedicated spots for tool storage and machining, you cut down on time spent searching for what you need.
Think about it. When everything has its place, you can grab tools and materials quickly. It’s been noted that this kind of organization can boost productivity by as much as 30%. That’s a significant jump for just tweaking your layout! Plus, having clear zones can keep distractions at bay. Instead of hopping from one place to another, you can focus and get things done faster.
Now, let’s chat about safety. Designated areas ensure that hazardous materials and tools are stored correctly, making your space safer overall. It seems simple, but it makes a big difference. It’s especially crucial in smaller workshops where space is at a premium. By optimizing every square foot, you not only enhance functionality but also keep things tidy.
So, why does this matter? Because a clean, well-organized workspace can make your projects go smoother and faster. You’ll be amazed at how much less clutter can contribute to your focus and peace of mind. Incorporating a dust collection system in your zones further enhances air quality and keeps your workspace free from harmful particles.
In short, taking the time to establish workshop zones pays off. It helps you work smarter and more safely, leading to better outcomes in your projects. What zones will you create to enhance your own workspace?
Which Workshop Zones Should You Set Up?
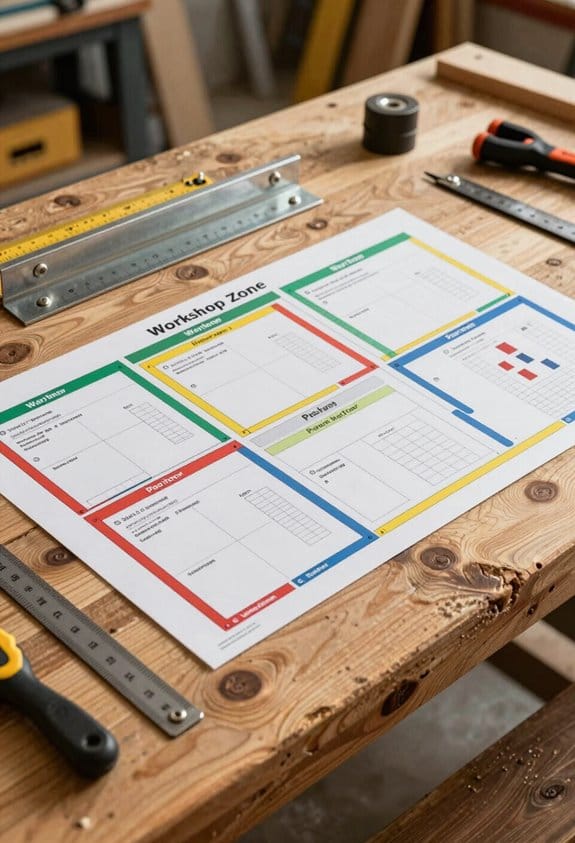
Have you ever stepped into a workshop and felt completely overwhelmed by the chaos? You’re not alone. Setting up your workshop zones is essential for keeping everything running smoothly. Here’s a straightforward approach to creating an efficient workspace.
First, think about your tool storage. You want a specific spot for your tools, so consider adding shelves and pegboards. This way, everything’s easily accessible when you need it. Trust me, there’s nothing more frustrating than wasting time searching for that one tool buried under a pile of stuff.
Next up is the cutting station. This should be right next to your lumber storage. It helps reduce the time you spend moving materials around, and let’s be honest, anything that saves you time during a project is worth it. Plus, it streamlines your workflow, allowing you to focus on getting things done.
You can’t forget about safety. A well-ventilated finishing zone is a must, especially when it comes to working with chemicals. Proper airflow isn’t just nice to have; it’s crucial. Make sure this area is clearly marked and separate from the rest of your workspace.
And let’s talk about cleaning. A designated clean-up zone can make a world of difference. Dust collection systems and cleaning supplies should be right there, encouraging you (and anyone else) to tidy up as you go. After all, no one wants to trip over dust and debris while trying to get work done.
Incorporating dust collection floor sweeps into your cleaning zone can significantly reduce dust and debris, promoting a healthier and safer workspace.
So, why does all this matter? Well, mapping out these specific zones can really help declutter your space and keep you focused. It’s all about improving your productivity and creating a safer environment to work in.
To wrap it up, setting up the right workshop zones is key to a more enjoyable and efficient experience. Have you thought about how your workshop could be better organized?
Recommended Products

Perfect for use in stationary or mobile dust-collection applications

ACCESSORY KIT: Dust Collection Floor Sweep, 4”x36” Clear Dust Pipe, Removable Grate, Quick Connect Coupler and Handle Assembly (dust hose not included)

INCLUDES: (1) Floor Sweep for Dust Collector, (1) Flexible Cuff Coupler with (2) Steel Clamps, (1) Round, Clear PVC Dust Collection Pipe; 4” OD, 5/64 inch wall thickness , 36” long (Clear with Blue Tint )
Efficient Tool Organization Within Workshop Zones

Ever feel like you’re digging through a mountain of tools to find that one perfect wrench or drill? It can be super frustrating and time-consuming. By organizing your workshop tools into specific zones, you’ll save yourself a lot of hassle, not to mention keep things safer while you work.
Start by grouping your tools based on where and how you use them. For instance, keep hand tools close to the workbench and power tools near the outlets. This setup cuts down on unnecessary trips around the shop and makes everything flow more smoothly. Plus, your back will thank you for not having to bend over and scavenge through clutter every time you need a tool.
Here’s a clever tip: use pegboards and shelving systems to take advantage of vertical space. Rather than letting tools pile up on the floor, get them off the ground. You can hang up those tools you use regularly, making them easy to grab while keeping your workspace tidy. Storage options like tool boards and shadow boards are fantastic because they visually show you where everything belongs—no more wondering, “Where did I put that thing?”
It’s also smart to reorganize periodically. Think about how often you reach for certain items. If a tool is getting used more, move it closer to you. By keeping a regular check on how your tools are arranged, you ensure that your workspace stays efficient and accessible for whatever project you tackle next.
To wrap it all up, a little thoughtful organization can go a long way in making your workshop a better place to work. Investing in a high-quality rolling tool chest can significantly streamline your storage and mobility, enhancing overall efficiency. So, what’s the first change you’ll make to your toolbox?
Recommended Products

METAL NAILBOARD: Our peg board panels are made of high quality steel with a powder coated finish that is strong, scratch resistant and easy to clean. Each small pegboard has a weight capacity of up to 50 lbs. This is a favorite product for tool organizers, DIY enthusiasts, store owners and office workers.

Value Package: Our pegboard tool organizer comes with 278pcs pegboard accessories, 16 different type pegboard hooks including 12pcs peg board bins, curved hooks, angled hooks, straight hooks, and ring tool holder, multi tool rack. 109pcs of them are peg locks for fixing hooks

Value Package: Our pegboard tool organizer comes with 120pcs pegboard accessories,16 different type pegboard hooks including 5pcs pegboard bins, curved hooks, angled hooks, straight hooks, and ring tool holder, multi tool rack. 49pcs of them are peg locks for fixing hooks
Creating a Workflow-Friendly Space: Tips and Strategies
Creating a Workflow-Friendly Space: Tips and Strategies
Ever feel like your workshop is more of a chaos zone than a productive space? You’re not alone. Setting up a workspace that truly works for you can feel overwhelming at times, but trust me, the payoff is huge in terms of both efficiency and safety.
Start by mapping your workshop into distinct areas for cutting, assembling, and finishing. This simple shift can really streamline your workflow and cut down on the amount of time you spend running around looking for tools. Imagine knowing exactly where everything is and not having to backtrack.
Now, think about clutter. Keeping your work areas tidy isn’t just about aesthetics—it can prevent accidents. Make sure you have clear walkways so you won’t trip over stray items. It’s a small change that can make a big difference in how safe you feel while working.
Lighting is another key factor. If you’ve ever tried working on a detailed project in poor light, you know how frustrating it can be. The best part is that simply adding a task light over your workstations can make all the difference. It allows you to see everything clearly, minimizing mistakes and helping you focus.
Materials storage is crucial too. Create a designated spot for your tools based on their function. Not only does this keep your workspace organized, but it also helps you find what you need faster. You’ll be amazed at how much time you save when you’re not digging through clutter to find a hammer.
In addition, investing in a reliable dust collection system significantly improves air quality and reduces cleanup time in your workshop.
So why does all this matter? A well-organized, thoughtfully arranged workshop doesn’t just promote productivity; it boosts your overall enjoyment of the work. You can dive into projects rather than dread the setup.
In a nutshell, establishing a workflow-friendly space takes some effort upfront, but the benefits are well worth it. What changes will you make to create your ideal workspace?
Recommended Products

【Super Bright Clamp Light】60 high brightness led beads, led sewing machine light and clamp work light, the 20W led work light provide 2000 lumen lighting source and 6500k white light, which can be used to light all the dark corners of the work bench, great little work light for small areas. This flexible clip on light it will No flickering or dimming occurs during operation, with a lifespan of approximately 45,000 hours.

【Vibration-Resistant Gooseneck】ABS+metal dual-layer neck withstands drill press/bandsaw oscillations. Holds focus on lathe chucks without sagging during 10hr shifts.

【3CCT Selectable for Work Areas】 – Choose 4000K, 5000K or 6500K with a simple toggle to match garages, workshops and workbenches, from softer general lighting to crisp task lighting.
Tips for Effective Zoning in Small Workshop Spaces
Creating effective zones in a small workshop can make a world of difference in how you tackle your projects, especially when you’re tight on space. Ever feel like you’re running in circles just trying to find the right tool? Establishing specific areas for tasks like cutting, assembling, and finishing can streamline your work and save you from unnecessary trips across the room.
Here’s the trick: make the most of your vertical space. Use shelves and pegboards to store your materials. This keeps everything organized and makes it easier to grab what you need without rummaging through piles of stuff. And don’t forget about mobile workstations! They let you shift things around based on what you’re working on, which can really enhance your flexibility.
Also, consider how you organize each zone. Clear signage can go a long way in maintaining order and reducing the time you waste searching for tools. While you’re at it, think about lighting and ventilation too. You want to ensure safety and good visibility, especially when you’re cutting wood or working with chemicals—trust me, it makes a difference. Implementing HEPA filtration and dust extraction systems in your workshop zones can significantly improve air quality and safety.
Recommended Products

COMPLETE KIT – Packed with 297 premium pieces, our peg board organizer accessories kit features 16 types of pegboard hooks including curved, angled, and straight hooks, along with 20 pegboard bins, a ring tool holder, a multi-tool rack, and peg locks to ensure secure, stable mounting for efficient garage organization

【DURABLE CONSTRUCTION】Constructed from robust material, these peg bins are designed to endure regular use. Perfect for securely holding screws, nuts, bolts, and more, ensuring your workspace remains organized and efficient.

COMPLETE KIT - Includes 320 pegboard accessories with multiple hook styles, storage bins, ring tool holders, multi-tool racks, and stainless steel double peg locks, providing a complete pegboard organization system for tools and hardware.
How to Ensure Safety Across Workshop Zones?
How to Ensure Safety Across Workshop Zones?
Ever been in a workshop and felt a little on edge about safety? You’re not alone. Keeping things safe in a workshop isn’t just about having the right gear; it’s about smartly organizing spaces too.
Start by designating specific areas for different tasks. This simple move can drastically cut down on hazards. By keeping potentially dangerous tools and machinery separated from general work areas, you’re already taking a solid step toward safety. Also, maintaining clear walkways is key. It helps prevent accidents and makes sure everyone can move around freely.
When it comes to storing materials, think safety first. You want to make sure tools are easy to grab but don’t create tripping risks. Fire extinguishers and first aid kits? Those should be within reach in every zone. You never know when an emergency might pop up, so being prepared can make all the difference.
Regular safety audits might sound like a chore, but they’re crucial. Take a good look around every now and then to pinpoint any hazards, especially with hazardous materials. Don’t brushed that off—fixing those issues can help keep everyone safe.
And let’s not forget about signage. It’s super helpful in building awareness and making sure everyone follows safety protocols. Signs can remind everyone what’s expected and help create a safer environment for all.
Organizing tools and materials on sturdy adjustable shelf brackets can also improve safety by reducing clutter and making items more accessible.
Recommended Products

PACKAGING CONTENT:You will receive 2 PCS safety warning sign.It is a rectangle with a length of 4IN and a width of 2IN, and has a certain thickness.

⚠️【PACKAGING CONTENT】You will receive a red safety first sign stickers,which comes with an adhesive backing and is very convenient to use, and the surface is a delicate matte with a certain thickness. This sign measures 11.4x8.3 inches, so your delivery person won't miss it!

★Quality Material: Made of durable metal tin, these striking signs will not bend, harmless, rust and fade.
Common Mistakes in Planning Workshop Zones
Planning workshop zones can seem daunting, right? But figuring out common mistakes is key to creating a smooth and efficient workspace. One big no-no is not setting up specific zones for different tasks. When you don’t do this, workflow gets disrupted, and you’ll find yourself moving around more than needed.
Another thing that often slips our minds is making sure you have enough power for your tools. Imagine trying to use a saw only to have it shut down because the circuit isn’t up to par. That is a recipe for frustration, not to mention risking equipment failure. Also, think about ventilation. If you’re working in woodworking or dealing with chemicals, proper airflow isn’t just a convenience; it’s a necessity for safety.
Storage can also be a sneaky issue. Underestimating how much you need can create clutter, and nobody wants to work in a messy environment. And let’s not forget the future! Ignoring potential expansion can box you in when it comes time to grow your workshop. So, here’s a tip: make sure each zone has enough space, gets natural light, and has minimal tripping hazards. These simple things can drastically boost both productivity and safety in your workshop. Using a dust separator can also help maintain a clean and healthy workspace by reducing dust accumulation.
Frequently Asked Questions
How to Plan Workshop Layout?
To plan our workshop layout, we’ll prioritize workshop organization by focusing on equipment placement for space efficiency, ensuring proper traffic flow, tool accessibility, safety measures, and incorporating collaboration areas, storage solutions, and layout flexibility for future needs.
What Are the Four Factors Considered in a Workshop Layout?
When planning our workshop layout, we consider space utilization, effective equipment placement, workflow efficiency, and safety regulations. Prioritizing staff interaction, accessibility design, and ergonomics focus helps us achieve ideal task organization and material flow.
What Is a Good Workshop Layout?
We’d think a chaotic workshop layout fosters creativity, but instead, a well-designed space enhances workflow efficiency. Prioritizing ergonomic practices, tool arrangement, and safety measures, combined with effective storage solutions and proper lighting, boosts our productivity.
Do and Don’ts for Workshop?
Let’s prioritize our workshop objectives by organizing space effectively, ensuring tool accessibility, and following safety protocols. We shouldn’t overcrowd or ignore feedback mechanisms; instead, we’ll enhance participant engagement and enable team collaboration through smart activity scheduling.


