As an Amazon Associate, we earn from qualifying purchases. Some links on this site are affiliate links at no extra cost to you. Our recommendations are based on thorough research and editorial judgment.

Shadow Reduction Techniques in Workshop Lighting Design
Do you ever find yourself frustrated with shadows in your workshop? You’re not alone! It’s a common issue that can really mess with your ability to see what you’re working on.
Fortunately, there are some straightforward ways to tackle this.
Try mixing both ambient and task lighting for better overall brightness. Aim for between 30 and 66 foot candles; that sweet spot really helps create a comfortable workspace.
If you feel like your light coverage is lacking, consider increasing your number of fixtures by about 30%. This little adjustment can make a big difference.
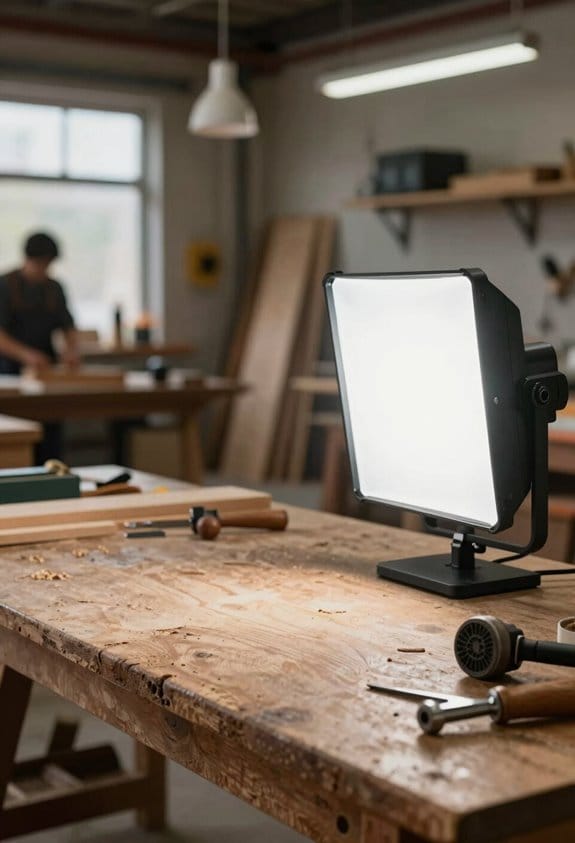
Here’s the trick: use diffusion materials to soften up those harsh shadows. It’s amazing how much of a change simple materials can make.
Lighter colors on your walls and larger lighting fixtures can also help spread the light out more evenly, tackling those pesky dark spots that can sneak into your setup.
Ever thought about the angle of your lights? Adjusting them and employing reflectors can really improve how clearly you see your workspace.
These small tweaks can add up nicely.
So, why does this matter? Well, a well-lit workshop not only helps you work better but also keeps your energy levels up.
Keep exploring these techniques as you refine your lighting, and you’ll likely notice the difference.
In conclusion, remember that a little attention to lighting can make your workshop experience so much better.
What’s one simple change you’re planning to make to reduce those shadows?
Key Takeaways
- Mix ambient and task lighting to create a balanced illumination, reducing harsh shadows in the workshop.
- Utilize diffusion materials and softboxes to soften light and minimize shadow intensity.
- Position multiple light sources strategically to fill in gaps and achieve even lighting across subjects.
- Adjust angles of light fixtures to enhance distribution and reduce the impact of shadows.
- Incorporate reflectors to bounce light onto subjects, further softening shadows and enhancing clarity.
How Lighting Affects Photography Outcomes in Workshops
Have you ever snapped a great photo only to realize later that the lighting just wasn’t right? It’s a common frustration for anyone involved in photography, especially during workshops. The truth is, the right lighting can take your images from bland to beautiful in a heartbeat.
Aim for around 100 foot candles of light when you’re in a photography setting. This level of illumination works wonders for clarity and detail in your shots. To get there, consider mixing ambient lighting with task lighting. This combo helps to create a more balanced setup, effectively reducing harsh contrasts that can ruin a good picture.
Here’s a tip: using softboxes or shaded lamps can really help soften those shadows and cut down on visual distractions. It’s like giving your photos a clean and polished look. Don’t be afraid to play around with different angles and arrangements of your light sources either. It can make a huge difference in how shadows appear, guiding the composition in a way that draws the viewer’s eye where you want it to go.
So, why does this matter? Well, mastering light in your photography not only boosts color perception, but it can also lead to stunning visuals that truly resonate with your audience. The best part is, once you learn these lighting tricks, you can carry them over to any photo shoot you undertake.
In a nutshell, paying attention to lighting can greatly enhance your photography results. Consider using 8-foot LED shop lights with an ideal color temperature of 4000K to 6000K to create a daylight-like ambiance that reduces flicker and eye strain during long sessions. Give these techniques a shot during your next workshop, and you just might surprise yourself with what you can create! What’s one lighting trick you plan to try out first?
Common Shadow Issues and Their Impact on Photography Quality
Have you ever looked at a photo and wondered why it doesn’t quite capture the essence of what you saw? One big culprit might be those pesky shadows that pop up and distract from the main event. Harsh shadows from direct lighting can end up burying essential details and making your subjects look less appealing. And don’t even get me started on those double shadows that can happen in high-contrast setups – they can really pull focus away from what you want to highlight.
You might also be familiar with the tunneling effect, which kicks in when the wall or ambient light lacks adequate illumination. This uneven lighting can really mess with your photos, making it tougher to get that perfect shot. So, what can you do about it?
Try this: think about using diffused lighting options. These are great for softening those shadows while still keeping clarity in the image. They can help create the depth and drama every good photo needs without overpowering it.
Also, consider adjusting your lighting setup. The best part is, you don’t have to go overboard. Just adding around 30% more bulbs or using multiple light sources can significantly reduce those annoying shadows. A well-lit environment does wonders for improving the overall quality of your photos.
Incorporating proper equipment with features like anti-fog coatings can help maintain visibility in varied environmental conditions.
Wrapping it up, paying attention to how shadows affect your shots can make a real difference. So, what lighting tricks do you plan to try on your next photoshoot?
Measuring Light Levels in Your Workshop for Photography
Have you ever tried taking photos in your workshop only to find the lighting just wasn’t right? Getting the right light levels is super important for snapping high-quality pictures, since light intensity can make or break your shot. Aim for lighting between 30 and 66 foot candles (FC) for best results, but if you’re tackling something that requires a little more precision, go for the higher end.
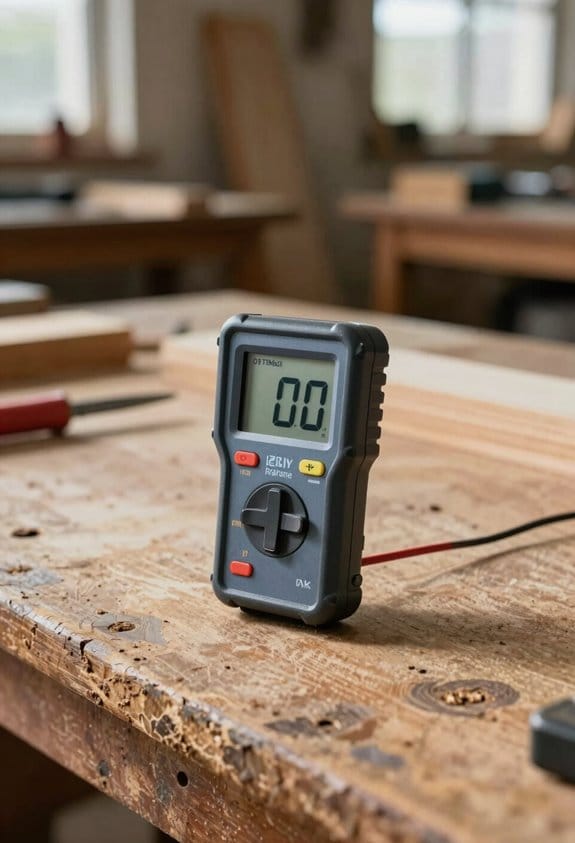
So how do you measure light levels? One handy tool is the Megaman Luxmeter, which can give you precise readings in Lux or foot candles. This is key to ensuring your lighting design is on point. Just remember, light intensity can differ depending on how far you are from the source or where the fixtures are placed. It’s a good idea to take measurements at various surfaces to get a true sense of your lighting situation.
Here’s a tip: to cut down on shadows, consider increasing the number of bulbs you’re using by about 30%. Spacing them out evenly can also help with light distribution. And don’t be afraid to play around with the angles of your lights or use diffusers; it can really make a difference in your photographs. Using tools with ergonomic handle designs can also help reduce fatigue during extended setup or adjustments, improving your workflow.
Essential Techniques for Effective Shadow Reduction
Are you tired of battling shadows in your workshop? It can be frustrating when you’re trying to focus, and those pesky shadows just won’t cooperate. Thankfully, there are some straightforward techniques you can try to brighten up your space and reduce those annoying shadows.
First off, consider putting together a solid lighting plan. Mixing different types of lights—like ambient for general brightness and targeted task lights for specific tasks—can work wonders. Overhead lights might cast harsh shadows, but by adjusting your setup, you can minimize that effect. Honestly, if you increase the number of fixtures by about 30%, you’ll notice a big difference in how evenly light spreads across your workspace.
Another tip? Think about adding diffusion. Using lamps with shades or some diffusion materials can really soften those sharp shadows that can be so distracting. If you opt for larger, broad lighting fixtures—around 6 inches—you’ll get a gentler light spread compared to those smaller, high-intensity options. This makes it easier on your eyes and creates a more inviting atmosphere.
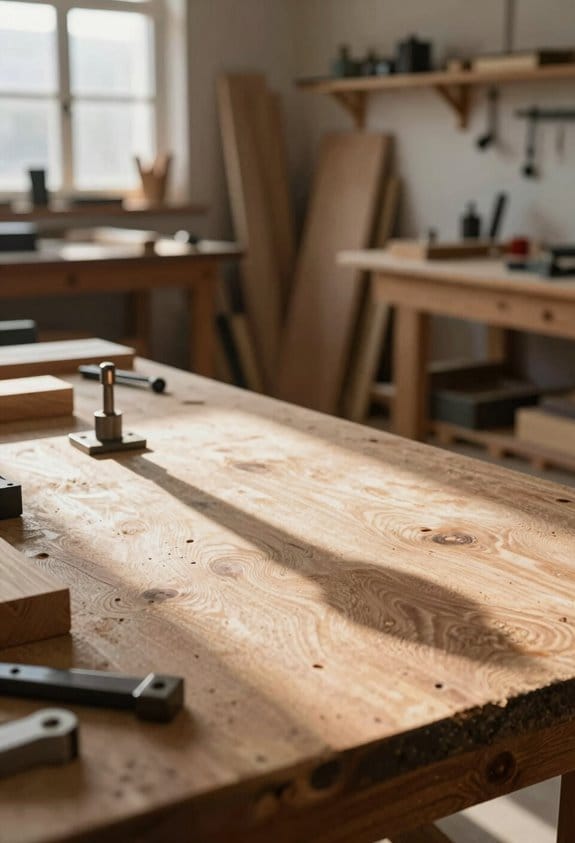
Lastly, don’t underestimate the power of placement and angles. Experimenting with where you put your lights and how you angle them can help control the shape and length of shadows, which is key for good visibility. You want to find that sweet spot where the light works just right for your tasks.
Additionally, selecting lighting fixtures with a suitable color temperature range (5000K to 6500K) can improve visibility and reduce eye strain in your workspace.
In short, making these lighting adjustments can transform your workshop into a more functional and enjoyable space. So, what changes will you make first?
Best Lighting Fixtures for Minimizing Shadows in Photography
When it comes to photography, one of the biggest challenges is dealing with shadows. If you’re tired of harsh lines ruining your shots, getting the right lighting fixtures can make a world of difference. Using larger, broad fixtures—think about six inches across—can help spread light evenly. This is a simple way to minimize those unflattering shadows that smaller sources tend to create.
Try adding diffused lighting, like lamps with shades. They really soften shadows and can transform the overall vibe, which is perfect for all kinds of photography. You might want to play around with the angles of your lights, too. This gives you more control over how the light hits your subject, allowing you to manage shadow length effectively. Another tip? Consider using adjustable fixtures for even more flexibility.
Don’t forget that adding multiple light sources can also work wonders. I’ve found that increasing the number of bulbs by about 30% helps fill in the dark spots that can creep into your photos. Combining ambient light with task lighting creates a layered effect that really enriches the illumination. Plus, this way, you won’t have to rely too heavily on those harsh overhead lights, which can be a real mood killer.
For optimal results, selecting lights with a high brightness level ensures your workspace is well-lit without creating additional shadows.
How Color Temperature Affects Shadow Perception in Photography
Ever notice how the light in a photo can really change the mood? That’s where color temperature comes into play! It’s measured in Kelvin (K) and affects how warm or cool the light appears. For example, if you’re shooting in warmer temperatures around 2700K to 3000K, you’ll get those nice, soft shadows. On the flip side, cooler temps above 5000K can produce sharper, more defined shadows.
So, what about that middle ground? A neutral range of 4000K to 4500K is fantastic for toning down harsh shadows, making it pretty versatile for all sorts of shots. Here’s the trick: mixing light sources with varying temperatures can add a beautiful depth to your images. This mix helps soften those hard edges and improves the overall quality of your photos.
Honestly, understanding how color temperature affects shadow perception can really elevate your photography. By experimenting with different light setups, you’re better equipped to capture the vision you have in mind. Plus, you might be amazed at the subtle changes that can make a big difference in your work. Choosing lighting with the right color temperature around 6000K can enhance shadow detail and provide cool daylight effects that benefit various creative tasks.
Combining Ambient and Task Lighting for Optimal Results
Ever feel like no matter how hard you try, your workspace just isn’t quite cutting it? Bright, clear areas are great for working, but mixing ambient and task lighting can really transform your workshop into a place that’s both functional and comfortable.
Start with some ambient lighting. Think about adding wall sconces or cove lighting. This creates a nice, soft layer that reduces harsh shadows and helps you better perceive your space. You wouldn’t believe how much a little warmth in the lighting can change the mood!
Now, let’s move on to task lighting. This is where things get exciting. Under-cabinet lights or desk lamps are perfect for focusing your brightness exactly where you need it. They can help you tackle those detailed projects without relying too heavily on those glaring overhead bulbs that can wear down your eyes over time. Here’s the trick: use dimmers! Adjusting your lighting based on what you’re working on or what time of day it is can make all the difference.
So, why does this matter? It’s not just about being able to see better; it’s also about creating a space where you can really thrive. Good lighting can help cut down glaring shadows and reduce eye strain, leading to a more enjoyable workshop experience. For optimal visibility, incorporating lights with a color temperature of 6500K mimics daylight and reduces eye strain during detailed tasks.
To wrap this up, combining ambient and task lighting isn’t just a nice touch; it’s a vital part of creating a workspace you love. What changes will you make to brighten up your space?
Selecting Hard Light or Soft Light for Your Workshop?
Have you ever walked into a workshop that just felt off? The lighting can make or break the vibe, and getting it right is important for both your comfort and productivity. Hard light is bright and can create stark shadows, which adds depth to a space but can also strain your eyes if not managed. On the flip side, soft light gently scatters, reducing shadows and glare, making it a more inviting option for long periods of work.
So, what kind of atmosphere are you trying to create? Hard light works wonders in energetic, creative settings where you want to feel alive and engaged. But if you’re looking for a calm, relaxed environment, soft light is your best pal.
Here’s a simple tip: experiment with angles and distances to see how shadows play in your space. Moving your light sources around can totally change the mood and functionality of your workshop. Honestly, you don’t have to stick with just one type of lighting; mixing both hard and soft light can provide a balanced setup that not only looks good but also helps reduce those harsh shadows.
When it comes down to it, putting thought into your lighting choices can really elevate your workshop experience. Maintaining a clean and safe workspace with effective tools like dust collection systems also complements good lighting by improving air quality and visibility. What kind of light makes you feel most productive?
Photography-Specific Adjustments for Optimizing Lighting Setup
Have you ever looked at your photos and thought, “What happened to the lighting?” We all want our images to shine, but harsh shadows and uneven light can really distract from our vision. To tackle this, consider adding some diffused light sources like softboxes or even using diffusion gels. They can do wonders for softening those pesky shadows.
Here’s the trick: Adjusting the angle and height of your lights is key. If you lower the lights, you’ll get longer shadows, while raising them tends to shorten them. So, play around with it — your photos will thank you!
Want to eliminate those shadows completely? It’s a good idea to use multiple light sources. I generally find that adding about 30% more bulbs creates a balanced look. And don’t forget about reflective surfaces; they can help spread light evenly and soften any harsh contrasts.
Honestly, experimenting with both hard and soft light can really elevate the quality of your shots. It’s all about finding that perfect balance. So, what’s holding you back from trying new techniques? Give it a go and enjoy the process of refining your skills!
For maintaining a clean and dust-free environment around your lighting setup, using a cyclone dust separator can significantly reduce airborne particles and improve air quality.
When to Consult a Lighting Design Expert for Photography Workshops
When it comes to photography workshops, figuring out the right lighting can be a real challenge. Ever feel stuck experimenting with different setups without much success? If you’re struggling to cut down on harsh shadows or just want better overall visibility, it might be time to reach out to a lighting design expert.
These pros know their stuff when it comes to mixing ambient, task, and accent lighting in a way that suits your needs perfectly. They can help soften and diffuse light to minimize issues like glare and that annoying tunneling effect that can ruin a great shot. The beauty of their expertise is that they can also ensure you’re hitting those recommended foot candle levels for visibility—especially helpful if you’ve got older participants in your workshop.
So, what else do they bring to the table? One big benefit is their insight into light placement. They can show you how to avoid double shadows that often pop up with flash photography setups. Honestly, those little tips can make a huge difference in your results, making your lighting efforts feel much more manageable.
If you’ve been feeling overwhelmed by lighting concerns, don’t hesitate to seek out an expert. You might just find that a little professional input makes all the difference in your photography workshops. What’s your biggest lighting struggle so far? Additionally, understanding the role of cuff type preference can influence comfort and mobility during long workshops when hand dexterity is crucial.
Frequently Asked Questions
Can Shadows Enhance Artistic Expression in Photography?
Absolutely, shadows can elevate our photography, weaving a tapestry of shadow storytelling. They add emotional depth, creating creative contrasts that breathe life into our images, transforming ordinary scenes into compelling narratives we can’t help but admire.
How Do Different Materials Affect Shadow Quality?
Different material types can greatly affect shadow quality. We’ve noticed that light diffusion varies based on surface texture, with smoother materials creating softer shadows, while rough textures can intensify shadow contrasts. It’s fascinating to explore!
What Role Does Camera Angle Play in Shadow Management?
Camera angle greatly affects shadow management; by adjusting camera positioning, we can control shadow depth and highlight lighting intensity. Let’s experiment with angles to discover how they influence the overall composition of our visuals.
Are There Specific Colors That Can Minimize Shadow Appearance?
Yes, specific colors can minimize shadow appearance! We’ve found that color temperature influence, contrasting hues impact, and saturation levels effect all play significant roles in how shadows interact with surfaces and lighting designs.
How Often Should Lighting Setups Be Adjusted for Varying Subjects?
We should adjust our lighting setups frequently, ideally with every new subject. With diverse subjects and varying lighting durability, regular adjustments keep our work dynamic and our results striking, guiding our creative journey like a well-composed symphony.


